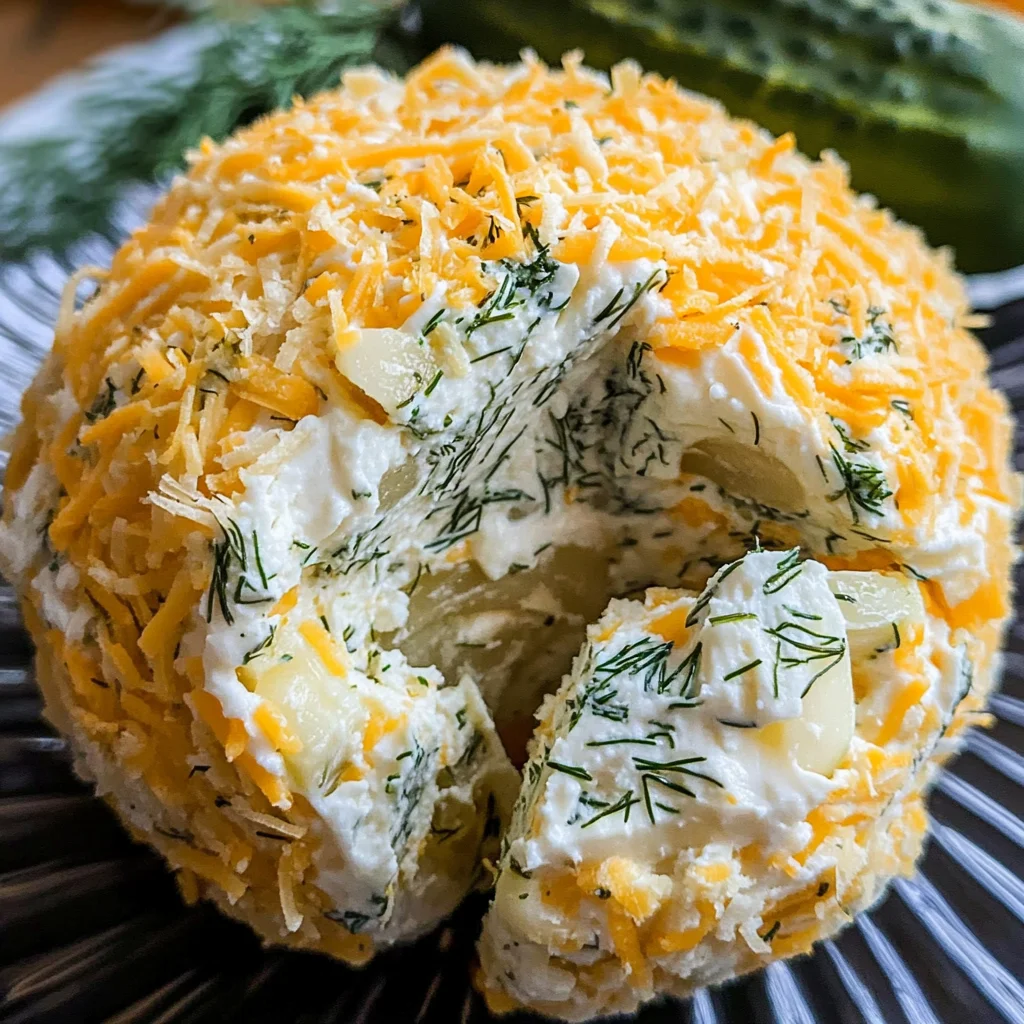
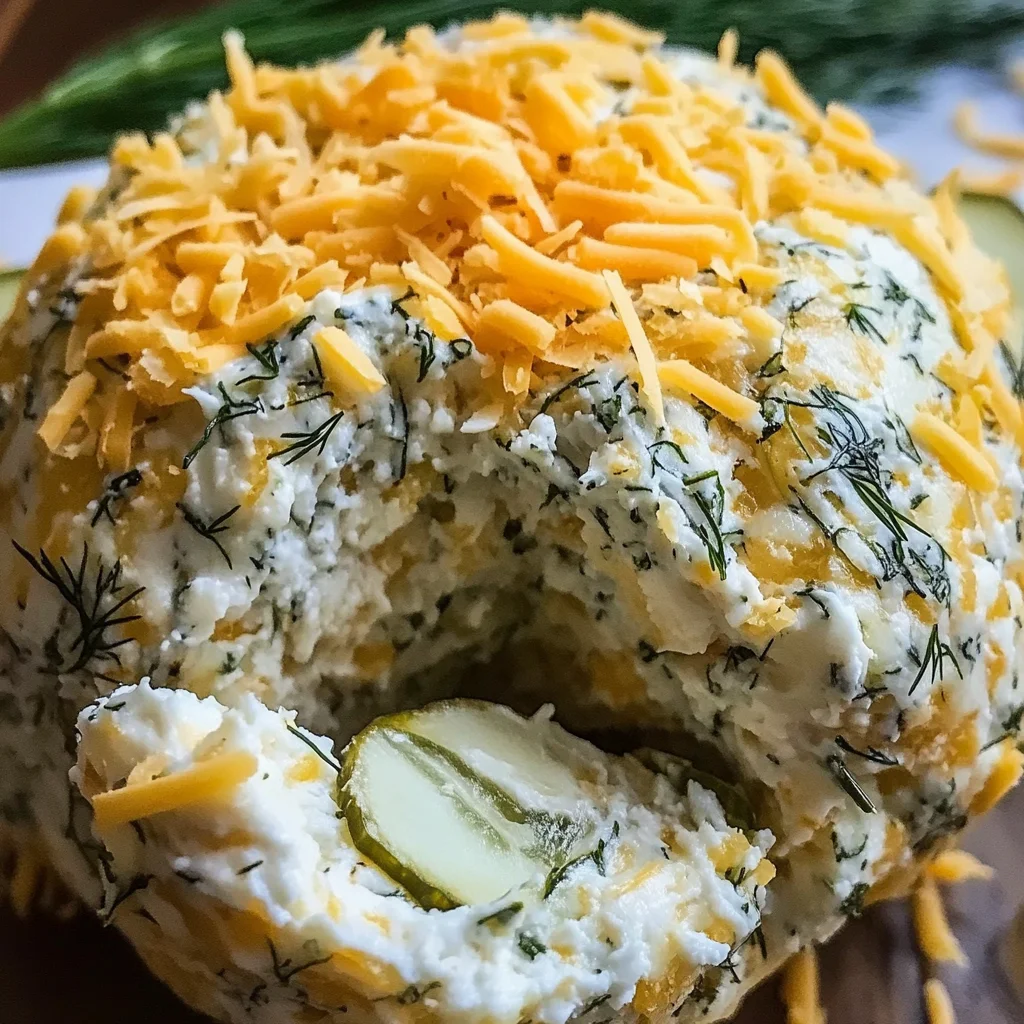
Dill Pickle Cheese Ball Recipe
If you’re looking for a fun and flavorful appetizer to impress your friends and family, then this Dill Pickle Cheese Ball Recipe is just what you need! It’s creamy, tangy, and packed with deliciousness that will have everyone coming back for more. This recipe has a special place in my heart because it’s super easy to whip up and always brings smiles at gatherings. Whether it’s game day or a festive celebration, this cheese ball is the perfect addition to any party platter.
What I love most about this Dill Pickle Cheese Ball is its versatility. You can serve it with an array of crackers, veggies, or even spread it on sandwiches for a quick bite. Plus, it’s a fantastic make-ahead option for those busy weeknights when you want something tasty without the fuss!
Why You’ll Love This Recipe
- Quick to Prepare: This recipe takes only 15 minutes of prep time, making it ideal for last-minute gatherings.
- Family-Friendly Flavor: The combination of dill pickles and cheddar cheese appeals to both kids and adults alike.
- Make-Ahead Convenience: Chill the cheese ball beforehand, so it’s ready to go when you are.
- Customizable Coating: Roll it in your favorite toppings for extra crunch and flavor.
- Crowd-Pleasing Appetizer: Perfect for parties, picnics, or even just a cozy night in with snacks.
Ingredients You’ll Need
You’ll be delighted to know that this recipe calls for simple and wholesome ingredients that you probably already have on hand. Let’s gather everything we need to create this scrumptious cheese ball!
For the Cheese Ball
- 16 ounces cream cheese, softened
- 4 tablespoons sour cream
- 1/2 teaspoon garlic powder
- 1 teaspoon lemon juice
- Salt and pepper, to taste
- 1 cup shredded cheddar cheese
- 1½ cups chopped dill pickles
- 2 tablespoons fresh chopped dill
For the Coating
- 1/2 cup shredded or chopped cheddar cheese
- 1 tablespoon fresh chopped dill
- 1 teaspoon lemon zest
Variations
This Dill Pickle Cheese Ball Recipe is wonderfully flexible! Here are some fun variations you can try:
- Add some spice: Mix in diced jalapeños or red pepper flakes for a little heat.
- Go nutty: Roll the cheese ball in crushed nuts like pecans or walnuts for added texture.
- Herb it up: Experiment with other fresh herbs like chives or parsley instead of dill.
- Swap the cheese: Try using different types of cheese like pepper jack or cream cheese blends for unique flavors.
How to Make Dill Pickle Cheese Ball Recipe
Step 1: Combine the Base Ingredients
Start by combining the cream cheese, sour cream, garlic powder, lemon juice, salt, and pepper in a mixing bowl. Blend until smooth. This step is essential because it creates a creamy base that holds all the flavors together beautifully.
Step 2: Fold in Flavorful Additions
Next, fold in the shredded cheddar cheese, chopped dill pickles, and fresh dill. Mixing these ingredients well ensures every bite will be bursting with flavor! The pickles add that delightful tanginess we all love.
Step 3: Shape Your Cheese Ball
Now comes the fun part! Place the mixture onto plastic wrap and shape it into a ball. This method helps maintain its round form while chilling. Don’t forget to chill your cheese ball for at least two hours; this helps all those wonderful flavors meld together!
Step 4: Coat and Serve
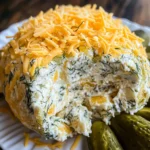
Once chilled, roll your cheese ball in the coating mixture until evenly covered. The extra cheddar and herbs add an appealing touch. Serve with an assortment of crackers or veggies, and watch as everyone digs in!
Pro Tips for Making Dill Pickle Cheese Ball Recipe
Making the perfect Dill Pickle Cheese Ball is easier than you think! Here are some handy tips to ensure your appetizer shines at any gathering.
- Use Room Temperature Cream Cheese: This helps in achieving a smooth and creamy texture, making it easier to blend with other ingredients.
- Chill Thoroughly: Allow the cheese ball to chill for at least two hours before serving. This not only helps the flavors meld together but also makes it easier to roll in the coating.
- Experiment with Cheese Varieties: While cheddar is delicious, try mixing in other cheeses like Monterey Jack or cream cheese with herbs for a unique twist on flavor.
- Customize Your Coating: Feel free to add chopped nuts or seeds to your coating mixture for added crunch and flavor. This can make your cheese ball even more appealing!
- Make Ahead of Time: Preparing your cheese ball a day in advance allows the flavors to develop beautifully and makes your day-of prep much simpler!
How to Serve Dill Pickle Cheese Ball Recipe
Presenting your Dill Pickle Cheese Ball with flair can elevate its appeal, making it an eye-catching centerpiece for any appetizer spread. Here are some creative ideas for serving this delightful dish.
Garnishes
- Fresh Herbs: Adding small sprigs of fresh dill or parsley around the cheese ball not only enhances its appearance but also adds a touch of freshness.
- Sliced Pickles: Arrange thin slices of pickles around the cheese ball for additional garnish and a pop of color that emphasizes the pickle flavor.
Side Dishes
- Crackers: A variety of crunchy crackers like water crackers, whole grain, or even flavored ones provide great textural contrast and compliment the creamy cheese ball perfectly.
- Vegetable Platter: Fresh vegetables such as carrots, cucumber sticks, and bell pepper strips not only add vibrant colors but also offer a healthy crunch that pairs wonderfully with the rich flavors of the cheese ball.
- Fruit Chutney: A tangy fruit chutney can provide a sweet counterbalance to the savory notes of the cheese ball, making each bite even more delightful.
- Breadsticks: Crunchy breadsticks or baguette slices work well as dippers, allowing guests to enjoy every last bit of this creamy treat!
With these tips and serving suggestions, your Dill Pickle Cheese Ball will surely be a hit at any gathering! Enjoy sharing this crowd-pleaser with family and friends.
Make Ahead and Storage
This Dill Pickle Cheese Ball Recipe is not only delicious but also perfect for meal prep! You can make it in advance, allowing the flavors to meld together beautifully. Here’s how to store it properly:
Storing Leftovers
- Place any leftover cheese ball in an airtight container.
- Refrigerate for up to 3-5 days.
- For best results, keep the coating separate until ready to serve again.
Freezing
- Wrap the uncoated cheese ball in plastic wrap tightly.
- Place it in a freezer-safe container or bag.
- Freeze for up to 2 months. Thaw in the refrigerator before serving.
Reheating
- This cheese ball is best served chilled; no reheating is necessary. Just bring it out of the fridge about 30 minutes before serving for optimal flavor and texture.
FAQs
If you’re curious about this recipe, here are some frequently asked questions!
Can I use low-fat cream cheese in the Dill Pickle Cheese Ball Recipe?
Absolutely! Low-fat cream cheese works just as well and will still give you that creamy texture you love.
How long will the Dill Pickle Cheese Ball last?
When stored properly in the refrigerator, your cheese ball can last between 3-5 days. Just be sure to keep it covered!
Can I add other ingredients to my Dill Pickle Cheese Ball Recipe?
Definitely! Feel free to experiment with additional herbs, spices, or even different types of cheese to suit your taste.
What should I serve with my Dill Pickle Cheese Ball?
Crackers, fresh veggies, or breadsticks are great accompaniments that enhance the flavors of this appetizer.
Final Thoughts
I hope you enjoy making this delightful Dill Pickle Cheese Ball Recipe as much as I do! It’s a special treat that’s sure to impress at any gathering. Whether you’re hosting a party or just having a cozy night in, this cheesy delight will bring smiles all around. Happy cooking, and don’t forget to share your experiences with me!
Dill Pickle Cheese Ball Recipe
Elevate your next gathering with this irresistible Dill Pickle Cheese Ball Recipe! Creamy, tangy, and packed with flavor, this delightful appetizer is a guaranteed crowd-pleaser that will have your guests coming back for seconds. With its perfect blend of cream cheese, sharp cheddar, and zesty dill pickles, this cheese ball is versatile enough to be served with crackers, fresh veggies, or used as a savory spread on sandwiches. Ideal for busy weeknights or festive celebrations, it can be made ahead of time and is simple enough for anyone to whip up in just 15 minutes. Bring smiles to your table with this deliciously fun appetizer that’s sure to become a favorite.
- Prep Time: 15 minutes
- Cook Time: None
- Total Time: 0 hours
- Yield: Approximately 12 servings 1x
- Category: Appetizer
- Method: Chilling
- Cuisine: American
Ingredients
- 16 ounces cream cheese, softened
- 4 tablespoons sour cream
- 1/2 teaspoon garlic powder
- 1 teaspoon lemon juice
- Salt and pepper, to taste
- 1 cup shredded cheddar cheese
- 1½ cups chopped dill pickles
- 2 tablespoons fresh chopped dill
- 1/2 cup shredded or chopped cheddar cheese for coating
- 1 tablespoon fresh chopped dill for coating
- 1 teaspoon lemon zest for coating
Instructions
- In a mixing bowl, combine softened cream cheese, sour cream, garlic powder, lemon juice, salt, and pepper until smooth.
- Fold in shredded cheddar cheese, chopped dill pickles, and fresh dill until well mixed.
- Shape the mixture into a ball using plastic wrap and chill in the refrigerator for at least two hours.
- Roll the chilled cheese ball in additional cheddar cheese, fresh dill, and lemon zest before serving.
Nutrition
- Serving Size: 1 serving
- Calories: 90
- Sugar: 1g
- Sodium: 150mg
- Fat: 7g
- Saturated Fat: 4g
- Unsaturated Fat: 2g
- Trans Fat: 0g
- Carbohydrates: 3g
- Fiber: 0g
- Protein: 5g
- Cholesterol: 20mg