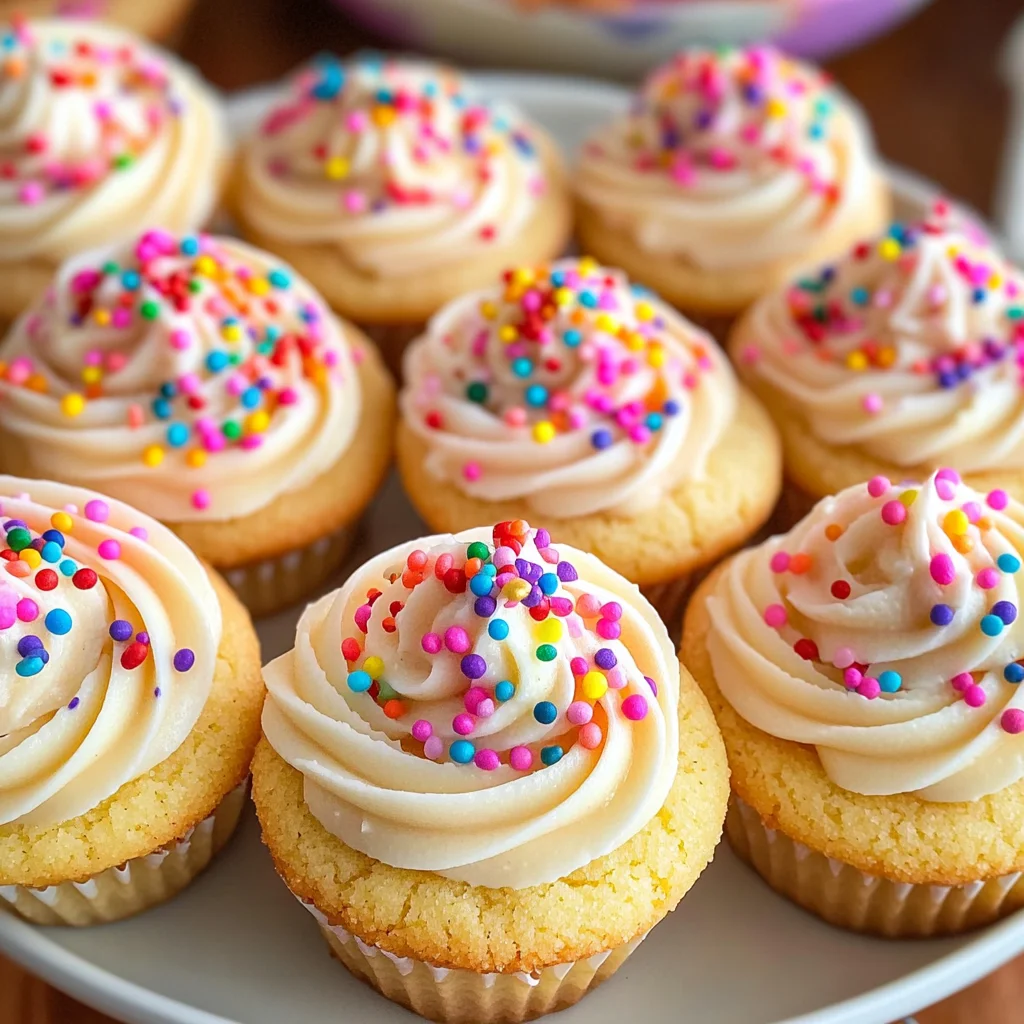
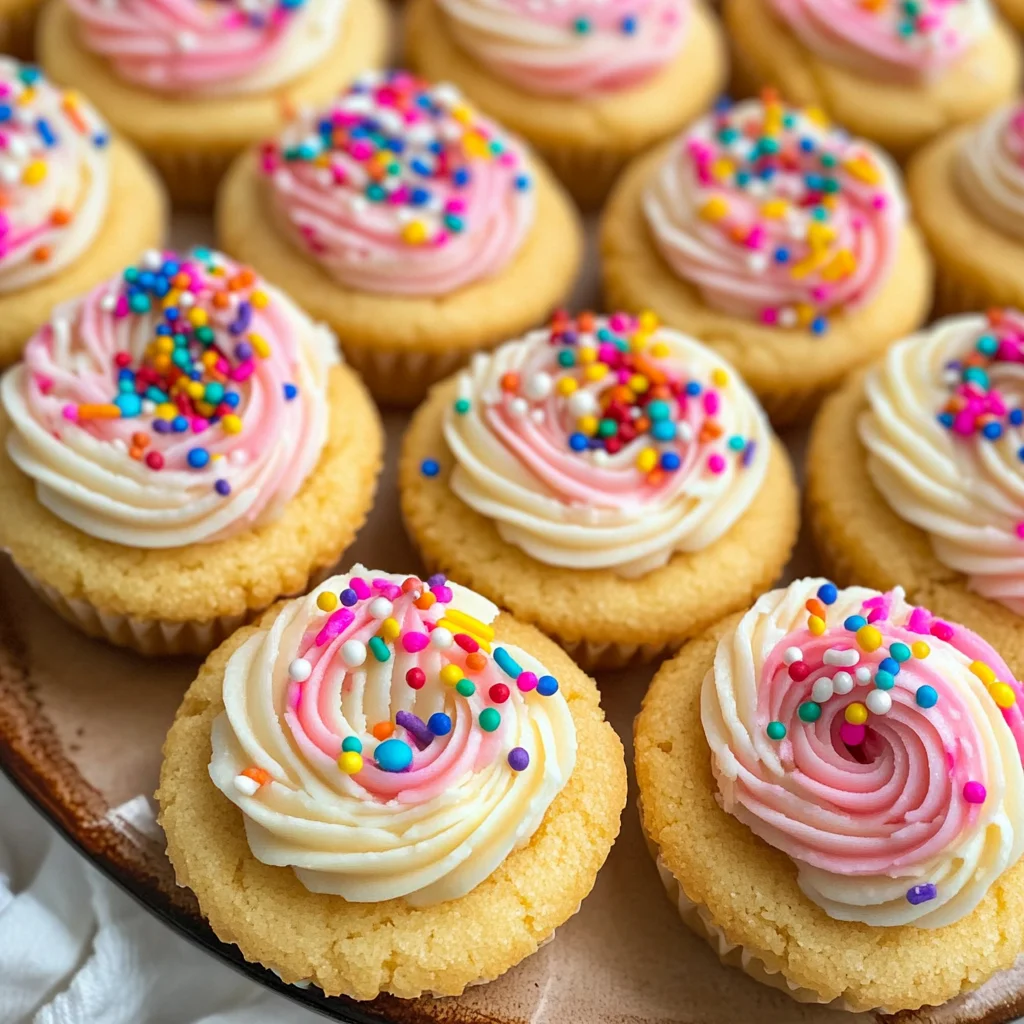
Sugar Cookie Cups
If you’re looking for a sweet treat that brings smiles to faces young and old, then you have to try these delightful Sugar Cookie Cups! They are not just adorable but also super fun to make. The soft sugar cookie base combined with the creamy frosting creates a dessert that feels special for any occasion, whether it’s a cozy family gathering or a lively birthday party. Plus, they are perfectly portioned, making them a hit with kids and adults alike!
Baking these cookies is more than just about enjoying a delicious treat; it’s about creating memories in the kitchen. I know you’ll love how easy they are to whip up, and they’ll quickly become a favorite in your home too!
Why You’ll Love This Recipe
- Easy to Make: With simple steps and common ingredients, you’ll be able to bake these sugar cookie cups without a hitch!
- Perfect for Any Occasion: Whether it’s a birthday, holiday, or just a fun treat for the week, these treats fit right in.
- Family-Friendly Fun: Kids love helping out with decorating the frosting and adding sprinkles – it’s definitely an activity everyone can enjoy together!
- Make-Ahead Convenience: You can prepare the cookie cups ahead of time and frost them just before serving for maximum freshness.
- Customizable Toppings: Add your favorite sprinkles or even different colors of frosting to match any celebration theme!
Ingredients You’ll Need
These Sugar Cookie Cups use simple, wholesome ingredients that you probably already have in your pantry. Let’s gather what we need to create this delightful dessert:
For the Cookie Cups
- 3/4 cup salted butter (softened)
- 3/4 cup granulated sugar
- 1 large egg
- 1 1/2 teaspoons vanilla extract
- 1/2 teaspoon almond extract
- 2 cups all-purpose flour
- 1 teaspoon baking powder
- 1/2 teaspoon baking soda
For the Frosting
- 2 ounces cream cheese (softened)
- 3 cups powdered sugar
- 1/4 cup butter (softened)
- 2 tablespoons milk
- 1/4 teaspoon vanilla extract
- Pink or red food coloring gel (optional)
- Sprinkles (for topping)
Variations
This recipe is so versatile! You can easily switch things up based on what you have at home or your personal preferences. Here are some fun ideas:
- Try Different Flavors: Swap out vanilla extract for lemon or orange extract to give your cookie cups a zesty twist.
- Add Chocolate Chips: Mix in some mini chocolate chips into the dough before baking for an extra touch of sweetness.
- Fruit Fillings: Instead of frosting, fill each cookie cup with whipped cream and fresh fruit for a refreshing take.
- Nutty Crunch: Fold in finely chopped nuts like walnuts or pecans into the dough for added texture and flavor.
How to Make Sugar Cookie Cups
Step 1: Preheat Your Oven
Preheat your oven to 350°F (175°C) and grease two regular muffin pans with nonstick cooking spray. This step ensures that your cookie cups come out easily after baking.
Step 2: Cream Butter and Sugar
In a large bowl, use an electric mixer or stand mixer to cream together the softened butter and granulated sugar until it’s light and fluffy. This usually takes about a few minutes. Remember to scrape down the sides of the bowl with a rubber spatula so everything gets mixed well!
Step 3: Add Egg and Extracts
Next, add in your egg along with both vanilla and almond extracts. Beat this mixture again until smooth. This will enhance the flavor and create that lovely sweet aroma.
Step 4: Combine Dry Ingredients
In another medium bowl, whisk together the flour, baking powder, and baking soda. This step helps distribute the leavening agents evenly throughout the flour.
Step 5: Form the Dough
Gradually add your dry mixture into the wet mixture. Mix until just combined; be careful not to over-mix! Over-mixing can lead to tough cookie cups instead of tender ones.
Step 6: Shape Your Cookie Cups
Press about 2 tablespoons of dough into the bottom of each muffin pan cup, then press it halfway up the sides using your fingers. This creates space for all that delicious frosting we’re going to add later.
Step 7: Bake Your Cookies
Bake those delightful cookie cups for around 12 minutes. Once done, let them cool for at least 15 minutes before pressing down gently in the center with a tablespoon or jar lid to form that cute cup shape.
Step 8: Whip Up Your Frosting
While they cool, begin making your frosting! In a medium bowl, beat together softened cream cheese and butter until smooth using an electric mixer. Gradually add powdered sugar, milk, and vanilla extract while mixing until you reach your desired consistency—this might take some adjusting with more milk or powdered sugar as needed.
Step 9: Decorate Your Cups
Once your cookies are completely cool, fill your piping bag fitted with a star tip (or simply use a spoon!) with frosting and swirl it generously into each cup. Top it off with sprinkles if desired—this is where you can get creative!
Now sit back, relax, and enjoy these beautiful Sugar Cookie Cups! They’re sure to bring joy with every bite!
Pro Tips for Making Sugar Cookie Cups
Making Sugar Cookie Cups is a delightful experience, and with these handy tips, you’ll ensure they turn out perfectly every time!
- Use room temperature ingredients: Let your butter and cream cheese sit out for about 30 minutes before starting. This helps them blend smoothly, creating that fluffy texture we all love.
- Don’t over-mix the dough: Once you combine the dry and wet ingredients, mix just until everything is incorporated. Over-mixing can lead to tough cookie cups, which we definitely want to avoid!
- Check for doneness: Baking times may vary slightly based on your oven. Keep an eye on your cookie cups; they should be lightly golden around the edges but still soft in the center when done.
- Cool completely before frosting: Patience is key! Letting them cool fully ensures that your frosting doesn’t melt off into a gooey mess and holds its shape beautifully.
- Experiment with flavors: While vanilla and almond extracts are classic choices, feel free to get creative! Try adding lemon or orange zest for a refreshing twist on this delightful dessert.
How to Serve Sugar Cookie Cups
Presenting your Sugar Cookie Cups can be just as fun as making them! Here are some ideas to make them look as sweet as they taste.
Garnishes
- Colorful Sprinkles: A sprinkle of colorful confetti sprinkles adds a festive touch—perfect for birthdays or celebrations!
- Chocolate Shavings: For a more sophisticated look, top each cup with chocolate shavings. This adds elegance and a rich flavor contrast.
Side Dishes
- Fresh Fruit Salad: A light and refreshing fruit salad pairs nicely with the sweetness of the cookie cups. Think berries, melons, and citrus for a vibrant mix.
- Vanilla Ice Cream: Serve alongside a scoop of vanilla ice cream for an indulgent treat. The creamy texture complements the cookie cups perfectly!
- Coffee or Tea: Offering a warm beverage like coffee or herbal tea not only balances the sweetness but also makes for a cozy dessert experience after dinner.
- Cheese Platter: For something savory, consider serving with a small cheese platter featuring creamy cheeses and crackers. The combination of sweet and savory will delight your guests!
Now that you have all these tips and serving suggestions at hand, it’s time to whip up some delicious Sugar Cookie Cups! Enjoy every moment of baking—and even more enjoying!
Make Ahead and Storage
These Sugar Cookie Cups are perfect for meal prep, making them a delightful treat to have on hand for any occasion. Whether you’re preparing for a festive gathering or just want a sweet snack at home, these cookie cups can be made ahead of time and stored easily.
Storing Leftovers
- Store any leftover cookie cups in an airtight container at room temperature for up to 3 days.
- If you live in a humid climate, it’s better to refrigerate them for freshness, where they can last up to 5 days.
- Keep the frosting separate if possible to maintain the texture of both the cookies and frosting.
Freezing
- To freeze, place the unfrosted cookie cups in a single layer on a baking sheet and freeze until solid.
- Transfer the frozen cookie cups to a freezer-safe bag or container, where they will keep well for up to 3 months.
- Frosting can also be prepared in advance and stored in the fridge for up to 1 week or frozen separately for up to 3 months.
Reheating
- For best results, let frozen cookie cups thaw overnight in the refrigerator before enjoying.
- If you prefer them warm, pop them in a preheated oven at 350°F (175°C) for about 5-7 minutes until warmed through.
- Re-frost after reheating if desired!
FAQs
Here are some common questions that might help you with your Sugar Cookie Cups experience:
Can I make Sugar Cookie Cups ahead of time?
Yes! You can prepare the cookie cups and store them without frosting. Frost right before serving for the best texture.
What is the best way to store Sugar Cookie Cups?
Store them in an airtight container at room temperature or refrigerate if you are in a humid environment. They will stay fresh for several days!
Can I use different flavors of frosting on my Sugar Cookie Cups?
Absolutely! Feel free to experiment with different flavored frostings like chocolate, lemon, or even peanut butter.
How can I make sure my Sugar Cookie Cups hold their shape?
Press the dough firmly into the muffin pan while shaping it into cups. Letting them cool completely before removing will help maintain their shape.
Final Thoughts
I hope you enjoy making these delightful Sugar Cookie Cups as much as I do! They’re not just delicious; they’re also versatile enough for any celebration or just a cozy night in. Remember, baking is all about having fun and expressing yourself—so don’t hesitate to add your own twist! Happy baking!
Sugar Cookie Cups

Indulge in the joy of baking with these delightful Sugar Cookie Cups! Perfectly portioned, these charming treats feature a soft sugar cookie base filled with creamy frosting, making them ideal for any occasion—from birthday parties to cozy family gatherings. The process of creating these mini desserts is not only straightforward but also a wonderful opportunity for family bonding in the kitchen. With customizable toppings and flavors, you can easily tailor them to match your celebration theme or personal taste. These Sugar Cookie Cups are sure to bring smiles to faces young and old!
- Prep Time: 20 minutes
- Cook Time: 12 minutes
- Total Time: 32 minutes
- Yield: Approximately 24 servings 1x
- Category: Dessert
- Method: Baking
- Cuisine: American
Ingredients
- 3/4 cup salted butter (softened)
- 3/4 cup granulated sugar
- 1 large egg
- 1 1/2 teaspoons vanilla extract
- 2 cups all-purpose flour
- 1 teaspoon baking powder
- 2 ounces cream cheese (softened)
- 3 cups powdered sugar
- 1/4 cup butter (softened)
- 2 tablespoons milk
- 1/4 teaspoon vanilla extract
- Pink or red food coloring gel (optional)
- Sprinkles (for topping)
Instructions
- Preheat your oven to 350°F (175°C) and grease two muffin pans.
- In a bowl, cream together softened butter and sugar until fluffy. Add the egg and extracts; mix well.
- In another bowl, whisk together flour, baking powder, and baking soda. Gradually combine with wet ingredients until just mixed.
- Press dough into each muffin cup, creating a small indent in the center.
- Bake for about 12 minutes or until lightly golden. Allow cooling before gently reshaping centers.
- For frosting, beat cream cheese and butter until smooth; gradually add powdered sugar and mix until desired consistency is reached.
- Once cookies are cool, frost generously and decorate with sprinkles as desired.
Nutrition
- Serving Size: 1 cookie cup (35g)
- Calories: 160
- Sugar: 10g
- Sodium: 100mg
- Fat: 7g
- Saturated Fat: 4g
- Unsaturated Fat: 2g
- Trans Fat: 0g
- Carbohydrates: 22g
- Fiber: 0g
- Protein: 1g
- Cholesterol: 20mg