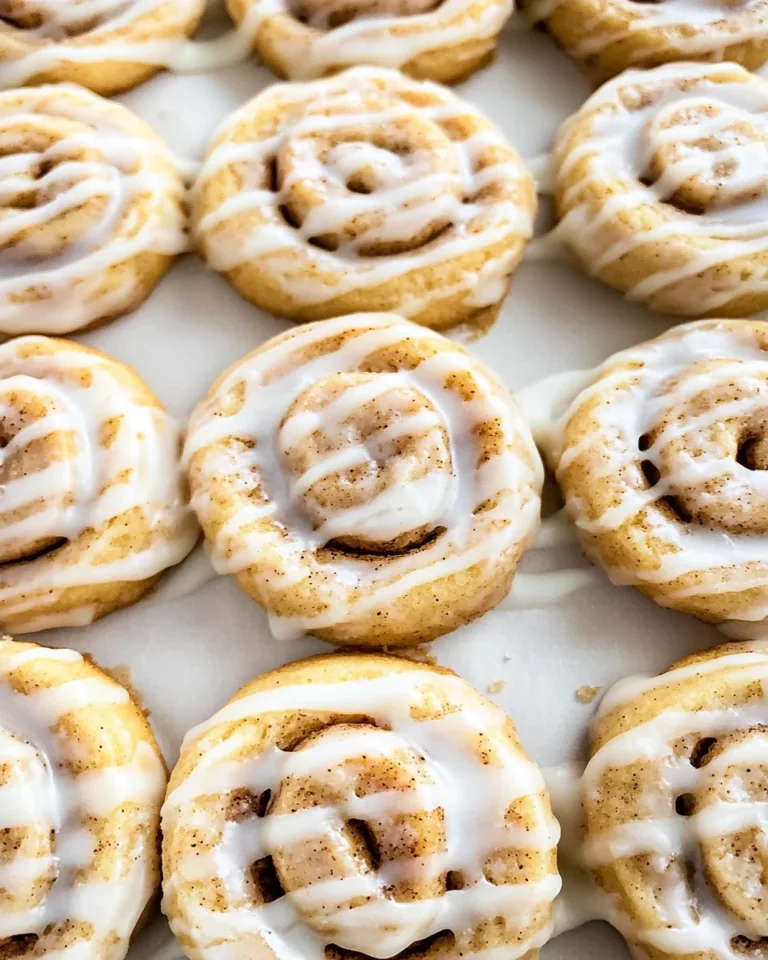
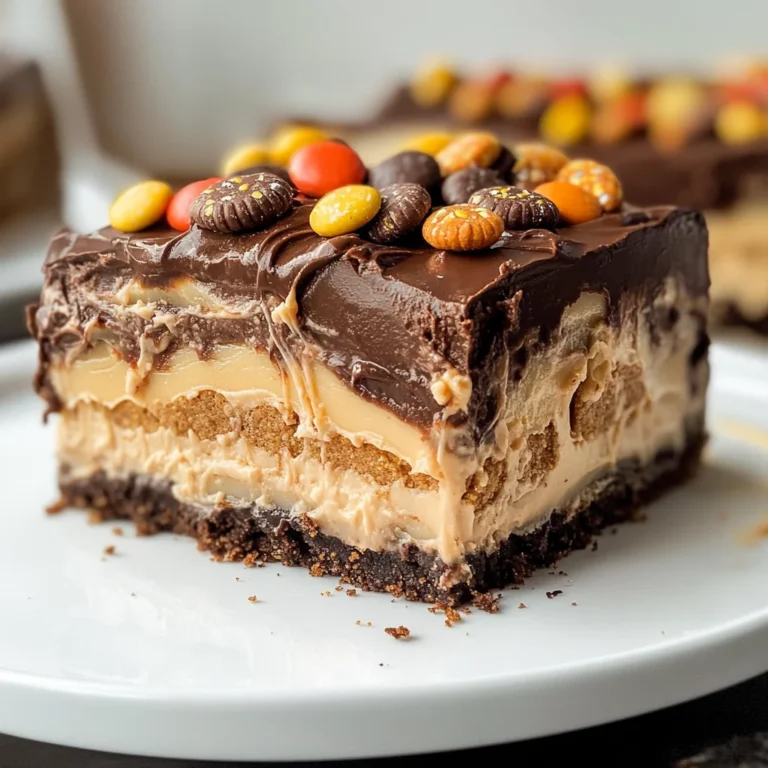
chocolate peanut butter sweet rolls
The chocolate peanut butter sweet rolls are a delightful treat that combines rich chocolate and creamy peanut butter in a soft, fluffy dough. Perfect for breakfast or dessert, these rolls will satisfy your sweet cravings any time of the day. Whether it’s a special occasion or a cozy family brunch, this recipe is sure to impress with its unique flavors and comforting textures.
Why You’ll Love This Recipe
- Decadent Flavor: The combination of chocolate and peanut butter creates a rich taste that’s hard to resist.
- Versatile Treat: Enjoy them for breakfast, dessert, or as an afternoon snack.
- Easy to Make: With simple ingredients and straightforward steps, this recipe is approachable for bakers of all levels.
- Impressive Presentation: These rolls look beautiful when served warm and frosted, making them perfect for gatherings.
- Customizable Options: Feel free to adjust the filling and frosting to suit your preferences.
Tools and Preparation
To make the chocolate peanut butter sweet rolls successfully, you’ll need some essential kitchen tools. Having the right equipment will streamline the process and ensure great results.
Essential Tools and Equipment
- Mixing bowl
- Nonstick pot
- Rolling pin
- Sharp knife
- 9×13 baking pan
Importance of Each Tool
- Mixing bowl: Essential for combining ingredients thoroughly without spilling.
- Nonstick pot: Ensures easy handling of the dough while preventing sticking during the rising process.
- Rolling pin: Helps in achieving an even thickness when rolling out the dough.
- Sharp knife: Necessary for cutting uniform slices of dough before baking.
Ingredients
For the Rolls
- 1 cup milk {dairy or non-dairy}
- 1 3/4 cups white flour {+ 3/4 cup (separated)}
- 1/4 dark cocoa powder {regular is okay (too!)}
- ¼ cup vegetable oil or melted coconut oil
- ¼ cup white sugar
- ½ tbsp instant active dry yeast {about ½ a package}
- ¼ tsp baking powder
- ¼ tsp baking soda
- ¼ tsp salt
For the Filling
- 3/4 cup creamy peanut butter
- 2-3 tbsp sugar
- 1/4 chocolate chips
For the Frosting
- 4 oz cream cheese (at room temperature)
- 4 tbsp unsalted butter (at room temperature)
- 1-2 tbsp peanut butter (to taste)
- 2 cups powdered sugar
- 1 tsp vanilla extract
- pinch of salt
- chopped peanut butter cups
How to Make chocolate peanut butter sweet rolls
Step 1: Activate the Yeast
In a large nonstick pot, combine the milk, oil, and ¼ cup of sugar. Heat up to about 120F over medium heat. Remove from burner and sprinkle the yeast on top. Let sit for a few minutes to activate.
Step 2: Prepare the Dough
Mix in the 1 3/4 cups of flour and 1/4 cup of cocoa. Cover with a clean tea towel and let rise for about 1 hour.
Step 3: Second Rise
After the first rise, add salt, baking powder, baking soda, and additional flour. Knead until all flour is absorbed; it should be soft but not too sticky. Cut an X on top of your dough, cover again with a tea towel, and let rise for at least 6 hours or overnight.
Step 4: Knead Again
Flour a clean surface lightly. Dump the dough on top and knead for about 2–3 minutes, adding more flour if necessary until smooth.
Step 5: Roll Out Dough
Using a rolling pin, roll out into a rough rectangle. Spread heated peanut butter evenly across it. Sprinkle with sugar and chocolate chips.
Step 6: Roll Up Dough
Start rolling from the long side closest to you. Make sure no filling falls out during this process.
Step 7: Slice Rolls
Using a large knife, cut slices about 1½–2 inches thick. Place them in a greased 9×13 pan with space between each roll.
Step 8: Final Rise
Cover pans with plastic wrap. Let them rise for an hour in a warm place or refrigerate overnight if needed.
Step 9: Bake
Preheat oven to 375F. Bake rolls for about 15–18 minutes until tops appear dry and cooked through.
Step 10: Make Frosting
While rolls are baking, beat together cream cheese, peanut butter, and unsalted butter until smooth. Add powdered sugar, vanilla extract, and salt; mix until creamy.
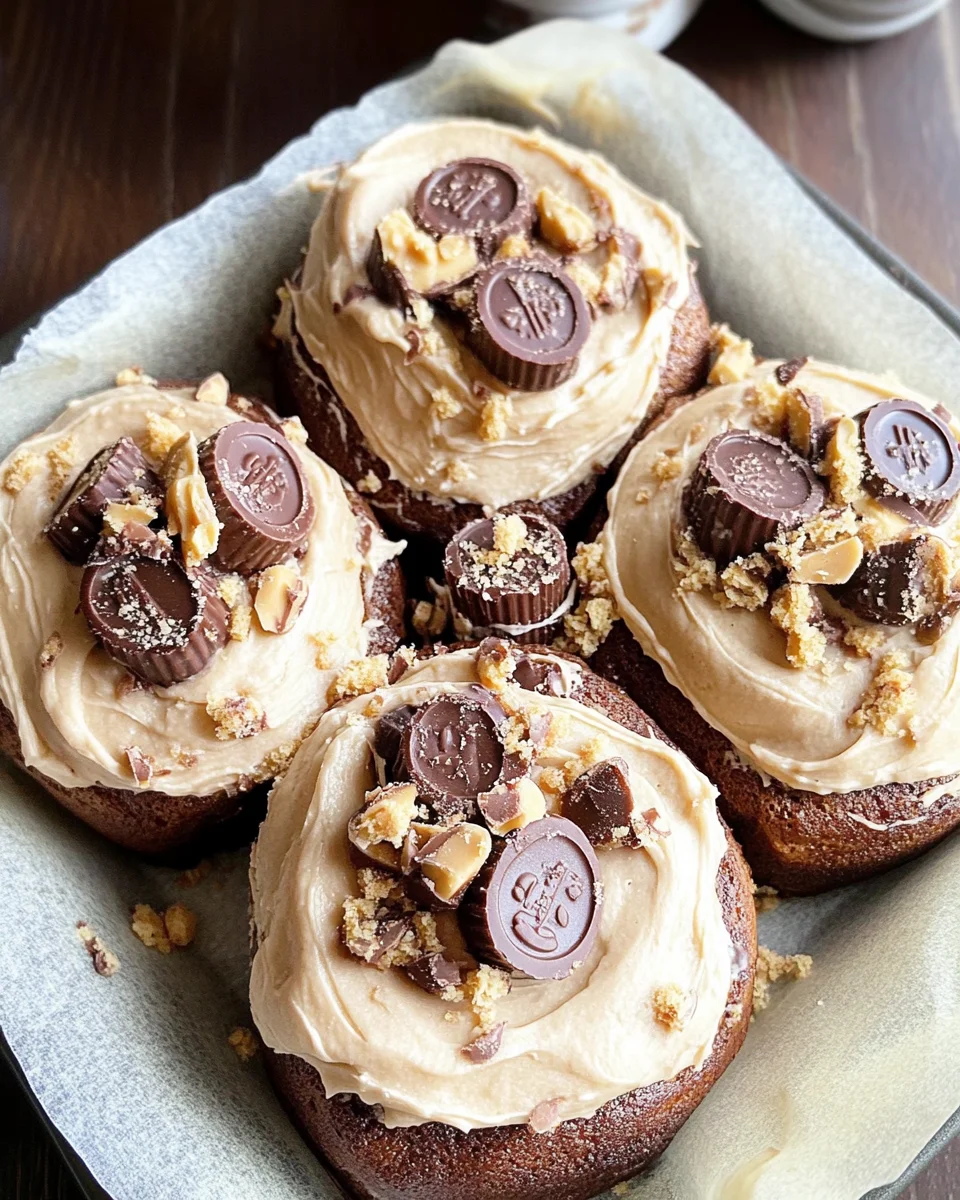
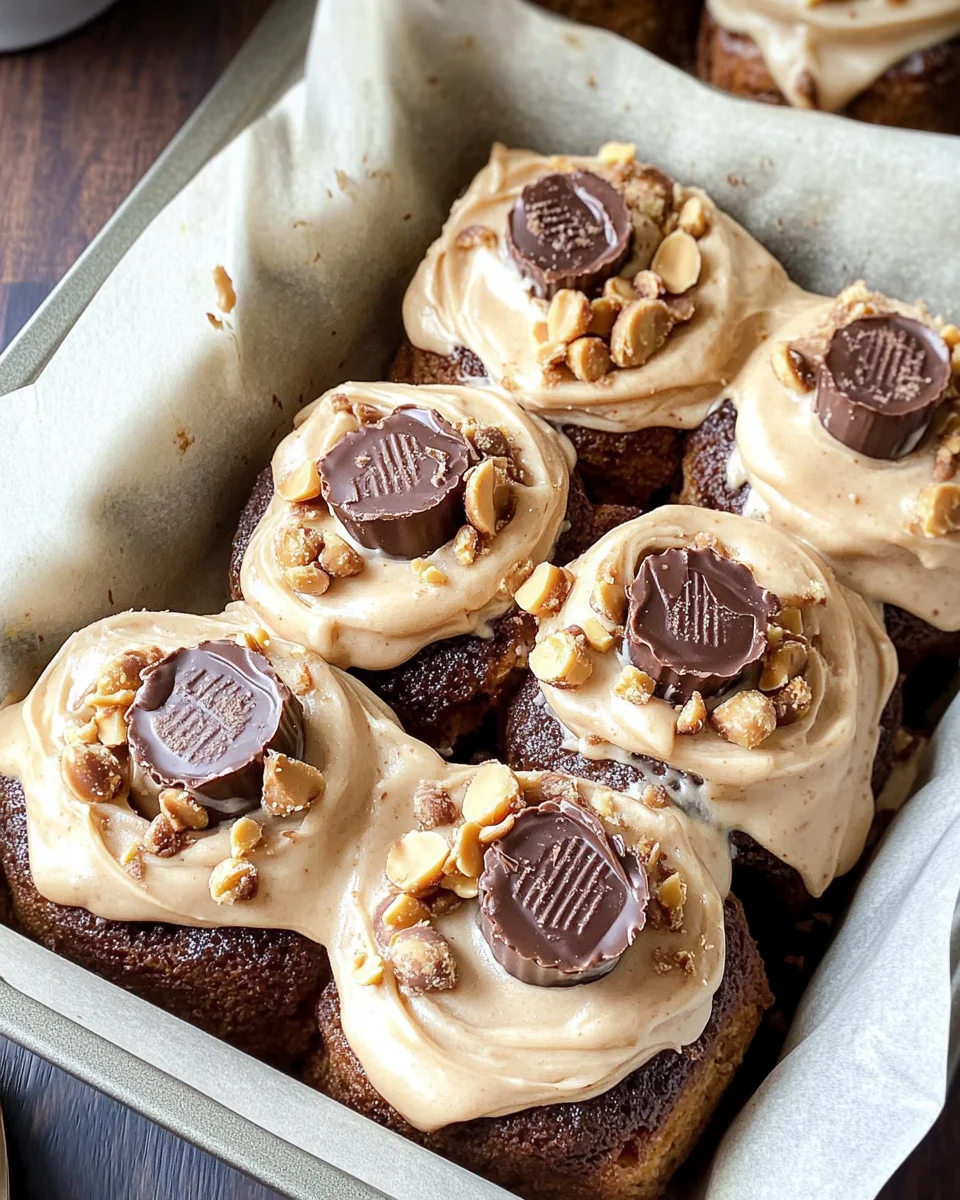
Step 11: Frost Rolls
Once cooled, spread frosting across rolls and sprinkle with chopped peanut butter cups before serving. Enjoy your delicious chocolate peanut butter sweet rolls!
How to Serve chocolate peanut butter sweet rolls
Serving chocolate peanut butter sweet rolls can elevate any meal or gathering. Whether you’re enjoying them for breakfast, dessert, or a special occasion, there are plenty of ways to present these delightful treats.
For Breakfast
- Pair with coffee – The rich flavors of the rolls complement a warm cup of coffee perfectly.
- Serve with fresh fruit – A side of berries or bananas adds a refreshing touch.
As a Dessert
- Top with ice cream – A scoop of vanilla ice cream on a warm roll creates a heavenly dessert.
- Drizzle with chocolate sauce – For extra indulgence, drizzle some chocolate syrup over the frosted rolls.
During Special Occasions
- Create a dessert platter – Arrange the rolls with other desserts for a stunning display at parties.
- Add festive sprinkles – Use colorful sprinkles on top of the frosting for birthdays or celebrations.
How to Perfect chocolate peanut butter sweet rolls
To achieve perfection in your chocolate peanut butter sweet rolls, consider these helpful tips.
- Use room temperature ingredients – Bringing ingredients like cream cheese and butter to room temperature helps create a smoother frosting.
- Don’t rush the rise – Allowing the dough to rise for the suggested time enhances its texture and flavor.
- Keep an eye on baking time – Each oven is different; check for doneness slightly before the time is up to avoid overbaking.
- Experiment with fillings – Try adding nuts or different types of chocolate chips for variety in flavor.
- Store properly – Keep any leftovers in an airtight container to maintain freshness.
Best Side Dishes for chocolate peanut butter sweet rolls
Pairing side dishes with your chocolate peanut butter sweet rolls can enhance your meal experience. Here are some great options:
- Fruit Salad – A mix of seasonal fruits provides a light and refreshing contrast.
- Yogurt Parfait – Layer yogurt with granola and fruits for a nutritious side.
- Scrambled Eggs – Fluffy eggs add protein and balance out the sweetness of the rolls.
- Bacon Strips – The salty crunch of bacon pairs well with the sweetness of the rolls.
- Hot Chocolate – A warm drink that complements the flavors and adds coziness.
- Smoothie Bowl – A smoothie topped with nuts and seeds can be refreshing alongside sweet rolls.
Common Mistakes to Avoid
Baking chocolate peanut butter sweet rolls can be fun, but common mistakes can lead to less-than-perfect results. Here are some pitfalls to watch out for.
- Using cold ingredients: Always ensure your milk and eggs are at room temperature. Cold ingredients can slow down yeast activation, resulting in dense rolls.
- Not kneading enough: Knead the dough until it’s soft and smooth. Insufficient kneading can lead to tough rolls that don’t rise properly.
- Skipping the second rise: Allowing the dough to rise a second time is crucial for fluffy rolls. Skipping this step may leave you with dense or doughy centers.
- Overcrowding the pan: Leave enough space between each roll in the baking dish. This helps them rise and creates that perfect soft texture.
- Ignoring oven temperature: Preheat your oven fully before baking. An oven that’s too cool will result in uneven baking and may leave your rolls undercooked.
Storage & Reheating Instructions
Refrigerator Storage
- Store chocolate peanut butter sweet rolls in an airtight container.
- They will last for up to 3 days in the refrigerator.
Freezing chocolate peanut butter sweet rolls
- Freeze rolls in an airtight container or freezer bag.
- They can be frozen for up to 3 months for optimal freshness.
Reheating chocolate peanut butter sweet rolls
- Oven: Preheat to 350°F (175°C). Wrap rolls in foil and heat for about 10-15 minutes.
- Microwave: Place a roll on a microwave-safe plate, cover with a damp paper towel, and heat for about 15-20 seconds.
- Stovetop: Heat a non-stick skillet over low heat, add the rolls, cover, and warm for about 5 minutes.
Frequently Asked Questions
Here are some answers to common questions about making chocolate peanut butter sweet rolls.
How do I make chocolate peanut butter sweet rolls from scratch?
To make chocolate peanut butter sweet rolls from scratch, follow the recipe provided above carefully, ensuring you allow proper rising times for the dough.
Can I use natural peanut butter instead of creamy?
Yes, you can use natural peanut butter; however, it may be less smooth than creamy varieties. Ensure it’s well-mixed before spreading.
How do I enhance the flavor of my chocolate peanut butter sweet rolls?
You can add a pinch of espresso powder to the dough or filling for a richer chocolate flavor. Experimenting with different types of cocoa powder can also elevate taste.
What if my dough doesn’t rise?
If your dough doesn’t rise, it may be due to expired yeast or too cold of an environment. Ensure your yeast is fresh and give it a warm place to rise without drafts.
Final Thoughts
These chocolate peanut butter sweet rolls are not only delicious but also versatile! Feel free to customize them by adding nuts or varying the type of chocolate used. With their delightful flavors and cozy appeal, they are perfect for any occasion. Give this recipe a try and enjoy baking!
Chocolate Peanut Butter Sweet Rolls

Indulge in the ultimate comfort treat with these chocolate peanut butter sweet rolls. Soft, fluffy, and bursting with rich flavors, they combine the beloved duo of chocolate and creamy peanut butter in a delightful pastry. Perfect for breakfast, dessert, or any cozy gathering, this recipe is not only easy to follow but also offers room for customization. Whether topped with a luscious frosting or enjoyed warm straight from the oven, these rolls are sure to satisfy your sweet cravings. Treat yourself and your loved ones to this decadent delight that promises smiles all around.
- Prep Time: 30 minutes
- Cook Time: 18 minutes
- Total Time: 48 minutes
- Yield: Approximately 12 servings 1x
- Category: Dessert
- Method: Baking
- Cuisine: Baked Goods
Ingredients
- 1 cup milk (dairy or non-dairy)
- 1 3/4 cups white flour (+ 3/4 cup separated)
- 1/4 cup dark cocoa powder
- 1/4 cup vegetable oil or melted coconut oil
- 1/4 cup white sugar
- 1/2 tbsp instant active dry yeast
- 1/4 tsp baking powder
- 1/4 tsp baking soda
- 1/4 tsp salt
- 3/4 cup creamy peanut butter
- 2–3 tbsp sugar (for filling)
- 1/4 cup chocolate chips
- 4 oz cream cheese (for frosting)
- 4 tbsp unsalted butter (for frosting)
- 1–2 tbsp peanut butter (for frosting)
- 2 cups powdered sugar (for frosting)
- 1 tsp vanilla extract (for frosting)
- pinch of salt (for frosting)
- chopped peanut butter cups (for serving)
Instructions
- Activate yeast by combining milk, oil, and sugar in a pot; heat to about 120F and sprinkle yeast on top. Let it sit.
- Mix in flour and cocoa powder; cover and let rise for about an hour.
- Add salt, baking powder, baking soda, and remaining flour; knead until smooth. Cut an X on top and let rise again for at least 6 hours or overnight.
- Roll out dough into a rectangle, spread heated peanut butter evenly, sprinkle sugar and chocolate chips.
- Roll up tightly from one side; slice into 1½–2 inch thick pieces and place in a greased pan.
- Cover and let rise for another hour before baking at 375F for about 15–18 minutes.
- Prepare frosting while rolls bake: mix cream cheese, peanut butter, butter, then add powdered sugar until creamy.
- Frost cooled rolls with the mixture and enjoy!
Nutrition
- Serving Size: 1 roll (70g)
- Calories: 285
- Sugar: 14g
- Sodium: 210mg
- Fat: 10g
- Saturated Fat: 3g
- Unsaturated Fat: 6g
- Trans Fat: 0g
- Carbohydrates: 43g
- Fiber: 1g
- Protein: 6g
- Cholesterol: 20mg