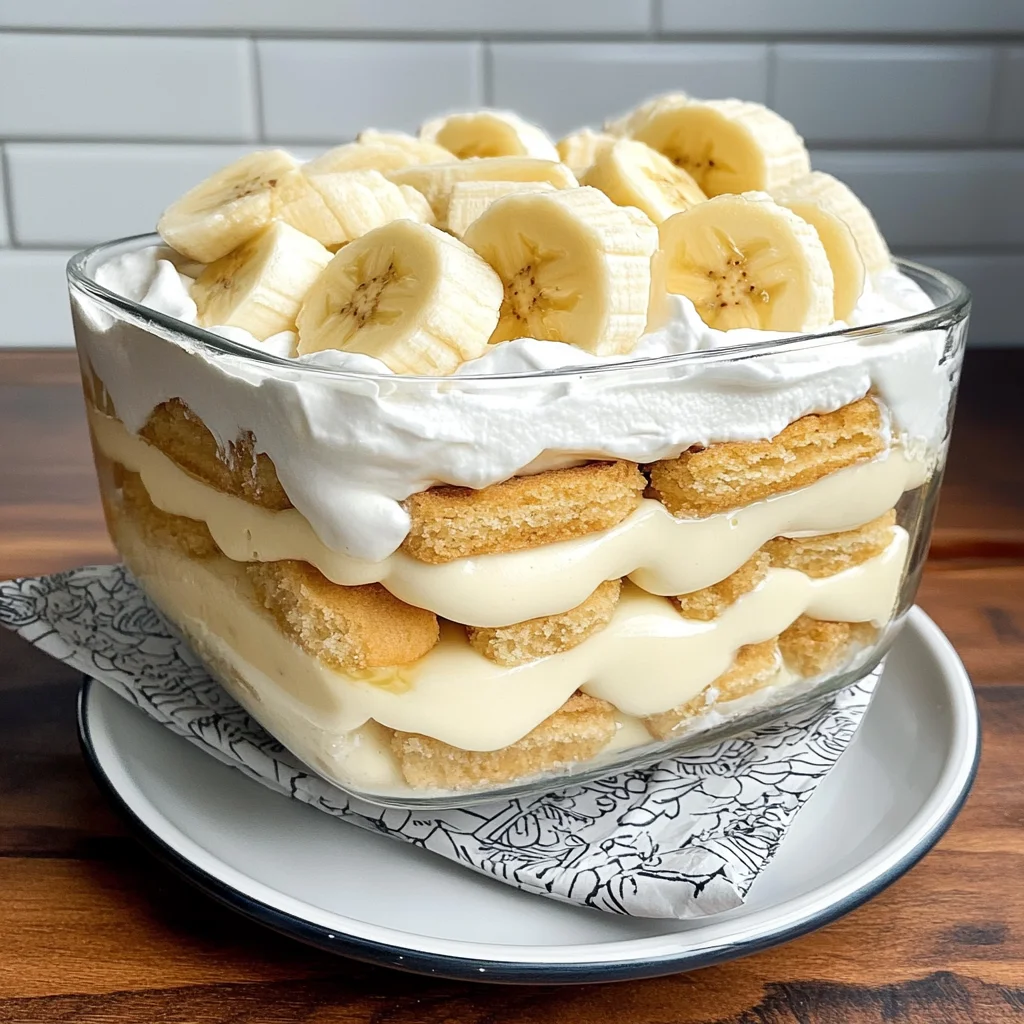
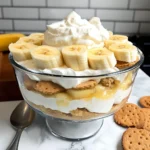
Easy Banana Pudding with Vanilla Wafers
If you’re looking for a delightful dessert that brings smiles to faces and warms the heart, then this Easy Banana Pudding with Vanilla Wafers is just what you need! This recipe has been a cherished favorite in my family for years. The combination of creamy vanilla pudding, ripe bananas, and crunchy vanilla wafers creates a comforting treat that’s perfect for any occasion—from busy weeknights to festive family gatherings.
What makes this banana pudding so special is its simplicity. It’s a no-bake dessert that can be whipped up in just 20 minutes, yet the flavors are so rich and satisfying that it feels like a labor of love. Plus, it tastes even better when made ahead of time! So grab your mixing bowl and let’s get started on this delicious journey together.
Why You’ll Love This Recipe
- No-Bake Convenience: This dessert comes together with zero baking required, making it a breeze to prepare.
- Family Favorite: With layers of creamy goodness and sweet bananas, it’s a hit with both kids and adults alike!
- Make-Ahead Marvel: Prepare it in advance and let it chill overnight for the best flavor—perfect for busy days!
- Versatile Layers: Feel free to adjust the layers based on your dish size or personal preference; it’s flexible and fun!
- Irresistibly Delicious: Each spoonful is packed with flavor—creamy, fruity, and oh-so-satisfying!
Ingredients You’ll Need
Let’s talk about the ingredients! You’ll find that these are simple, wholesome items that you likely already have in your pantry. Together, they create the magical layers of flavor in our Easy Banana Pudding with Vanilla Wafers.
- 8 ounces softened cream cheese
- 14 ounce can sweetened condensed milk
- 2 3.4 oz. boxes instant vanilla pudding
- 2 3/4 cups cold milk
- 8 ounces Cool Whip, divided
- 60 vanilla wafers (you may need more if using a 9 x 13 pan)
- 5-7 ripe bananas, sliced
Variations
This recipe is wonderfully flexible! Here are some fun ways to customize your Easy Banana Pudding:
- Add Some Chocolate: Layer in some chocolate pudding or sprinkle chocolate shavings between layers for a decadent twist.
- Nutty Crunch: Incorporate chopped nuts like pecans or walnuts for added texture and flavor.
- Berry Bliss: Mix in some fresh berries such as strawberries or blueberries for a fruity surprise.
- Dairy-Free Delight: Substitute dairy-free cream cheese and whipped topping to make this dessert suitable for dairy-free diets.
How to Make Easy Banana Pudding with Vanilla Wafers
Step 1: Beat the Cream Cheese
In a large mixing bowl, beat the softened cream cheese until smooth. This step is crucial because it creates a creamy base for our pudding mixture. A smooth consistency ensures that every bite will be velvety!
Step 2: Mix in Condensed Milk
Add the sweetened condensed milk to the cream cheese mixture. Blend until there are no lumps. This will add sweetness and richness to our pudding, making each layer absolutely divine.
Step 3: Prepare the Pudding
In another bowl, mix together the instant vanilla pudding and cold milk until smooth. This step activates the pudding mix so it thickens nicely once combined with our cream cheese mixture.
Step 4: Combine Everything
Pour the prepared pudding into the cream cheese mixture and mix until completely combined. This blend creates that luscious texture we all love in banana pudding!
Step 5: Fold in Cool Whip
Gently fold in half of the Cool Whip into your creamy mixture. Folding helps maintain that light texture we want while ensuring every bit of fluffiness is included.
Step 6: Layer It Up
Now it’s time for layering! Line the bottom of your dish with vanilla wafers, followed by banana slices. Spread an even layer of your pudding mixture on top. Repeat these layers until you reach the top of your dish—four layers work perfectly in a trifle dish!
Step 7: Top It Off
Spread the remaining Cool Whip over the top layer of pudding. This adds a lovely finish and provides a canvas for any toppings you might want later!
Step 8: Chill Out
Cover your dish and chill it in the refrigerator for at least four hours—overnight is even better! Chilling allows all those flavors to meld beautifully together.
Step 9: Serve & Enjoy
Just before serving, crush a few Nilla Wafers on top of the Cool Whip or add fresh banana slices if desired. Then dig into this scrumptious dessert—you’ll be glad you did!
Remember to store any leftovers wrapped tightly or in an airtight container in the fridge for up to four days (if it lasts that long!). Enjoy every delightful bite!
Pro Tips for Making Easy Banana Pudding with Vanilla Wafers
Creating the perfect banana pudding can be a delightful experience, and with a few handy tips, you can take your dessert to the next level!
-
Use Ripe Bananas: Selecting bananas that are ripe but not overripe ensures they are sweet and easy to slice. This adds great flavor and texture to your pudding layers.
-
Chill Your Ingredients: Make sure your milk is cold when preparing the pudding. Cold ingredients help the pudding set properly and enhance the overall creaminess of the dessert.
-
Layer Smartly: For even distribution of flavors, ensure each layer contains a good balance of wafers, bananas, and pudding. This creates a harmonious blend in every bite and improves presentation.
-
Keep It Covered: Cover your banana pudding with plastic wrap while chilling. This helps prevent any unwanted odors from being absorbed and keeps the surface from drying out.
-
Crush Wafers Just Before Serving: If you’re adding crushed vanilla wafers as a topping, do this right before serving to maintain their crunchiness. This contrast in texture makes each bite even more enjoyable!
How to Serve Easy Banana Pudding with Vanilla Wafers
Serving your Easy Banana Pudding with Vanilla Wafers can be just as fun as making it! Here are some ideas to present this delightful dish beautifully.
Garnishes
- Fresh Mint Leaves: A few sprigs of mint on top add a pop of color and a refreshing hint of flavor that complements the sweetness of the pudding.
- Chocolate Shavings: Lightly sprinkle chocolate shavings over the top for an elegant touch that introduces a rich flavor contrast.
Side Dishes
-
Fruit Salad: Toss together various fresh fruits like berries, melon, and grapes for a light, refreshing side that enhances the sweetness of your banana pudding.
-
Pineapple Upside-Down Cake: The caramelized pineapple pairs wonderfully with the creamy banana pudding, creating a lovely tropical theme for your dessert table.
-
Homemade Whipped Cream: Serve alongside a bowl of freshly whipped cream for those who want an extra dollop on their pudding. It adds lightness and enhances the dish’s decadence.
With these tips and serving suggestions, your Easy Banana Pudding with Vanilla Wafers will surely be a hit at any gathering! Enjoy making it and watch it disappear in no time!
Make Ahead and Storage
This Easy Banana Pudding with Vanilla Wafers is perfect for meal prep! Not only does it save you time on busy days, but it also allows the flavors to meld beautifully overnight, making it an ideal dessert for gatherings or family dinners.
Storing Leftovers
- Store any leftover banana pudding in an airtight container.
- Keep it in the refrigerator for up to 3-4 days.
- If possible, avoid adding fresh banana slices until right before serving to maintain freshness.
Freezing
- This dessert is best enjoyed fresh, but if you need to freeze it, do so without the whipped topping.
- Wrap tightly in plastic wrap or store in a freezer-safe container.
- It can be frozen for up to one month. Thaw overnight in the refrigerator before serving.
Reheating
- There’s no need to reheat this dessert; it’s served chilled!
- If your pudding has been frozen and thawed, give it a gentle stir before serving to restore its creamy texture.
FAQs
Here are some common questions about making this delicious dessert.
How do I make Easy Banana Pudding with Vanilla Wafers from scratch?
To make Easy Banana Pudding with Vanilla Wafers from scratch, you’ll combine softened cream cheese, sweetened condensed milk, instant vanilla pudding mix, and cold milk. Layer with vanilla wafers and sliced bananas!
Can I prepare Easy Banana Pudding with Vanilla Wafers ahead of time?
Absolutely! This recipe is great for making ahead. Chill it overnight for the best flavor and texture!
What can I use instead of Cool Whip in Easy Banana Pudding with Vanilla Wafers?
You can substitute Cool Whip with homemade whipped cream made from heavy cream or a non-dairy whipped topping if you prefer.
How long does Easy Banana Pudding with Vanilla Wafers last in the fridge?
Your Easy Banana Pudding will last about 3-4 days when stored in an airtight container in the refrigerator.
Can I add other fruits to my Easy Banana Pudding with Vanilla Wafers?
Yes! Feel free to experiment by adding other fruits like strawberries or blueberries between the layers for a delightful twist!
Final Thoughts
I hope you enjoy making this Easy Banana Pudding with Vanilla Wafers as much as I do! It’s a timeless dessert that brings back fond memories and is sure to be a hit at your next gathering. So go ahead, treat yourself and your loved ones to this creamy, dreamy delight. Happy cooking!
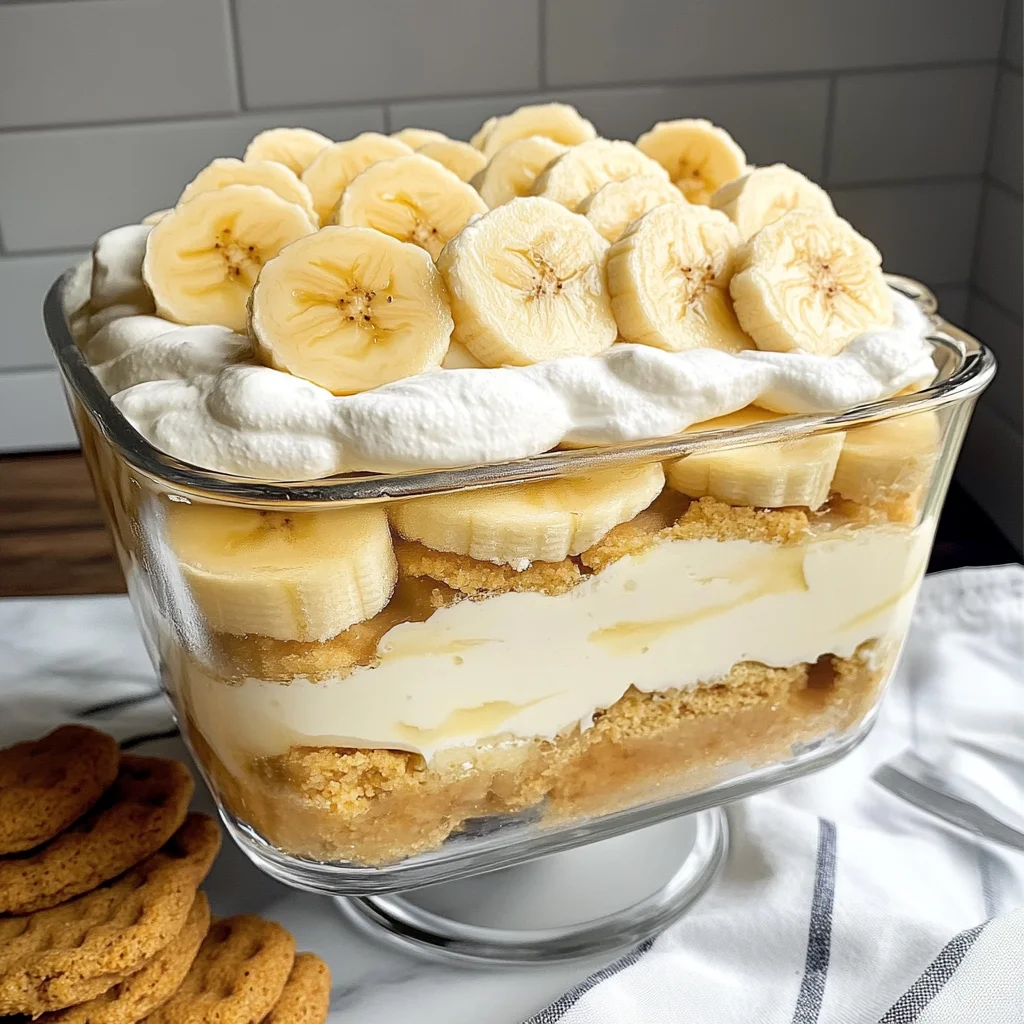
Easy Banana Pudding with Vanilla Wafers
If you’re searching for a delightful dessert that’s sure to bring smiles and satisfy cravings, look no further than this Easy Banana Pudding with Vanilla Wafers. This beloved recipe combines layers of creamy vanilla pudding, fresh bananas, and crunchy vanilla wafers, making it a comforting treat perfect for any occasion—from busy weeknights to festive gatherings. Best of all, it requires no baking and can be prepared in just 20 minutes! Allowing the pudding to chill overnight enhances the flavors even more, making it an ideal make-ahead dessert. So grab your mixing bowl and prepare to indulge in this deliciously easy dish that will become a family favorite.
- Prep Time: 20 minutes
- Cook Time: None
- Total Time: 0 hours
- Yield: Serves approximately 8
- Category: Dessert
- Method: No-Bake
- Cuisine: American
Ingredients
- 8 ounces softened cream cheese
- 14 ounce can sweetened condensed milk
- 2 (3.4 oz) boxes instant vanilla pudding
- 2 3/4 cups cold milk
- 8 ounces Cool Whip, divided
- 60 vanilla wafers
- 5–7 ripe bananas, sliced
Instructions
- In a large mixing bowl, beat softened cream cheese until smooth.
- Mix in the sweetened condensed milk until there are no lumps.
- In another bowl, combine instant vanilla pudding with cold milk until smooth.
- Pour pudding into the cream cheese mixture and mix until well combined.
- Gently fold in half of the Cool Whip.
- Layer vanilla wafers at the bottom of your dish followed by banana slices and pudding mixture; repeat layers until filled.
- Top with remaining Cool Whip and chill for at least four hours or overnight.
- Before serving, add crushed wafers or fresh banana slices on top if desired.
Nutrition
- Serving Size: 1 cup (240g)
- Calories: 350
- Sugar: 35g
- Sodium: 210mg
- Fat: 15g
- Saturated Fat: 8g
- Unsaturated Fat: 5g
- Trans Fat: 0g
- Carbohydrates: 49g
- Fiber: 1g
- Protein: 6g
- Cholesterol: 30mg