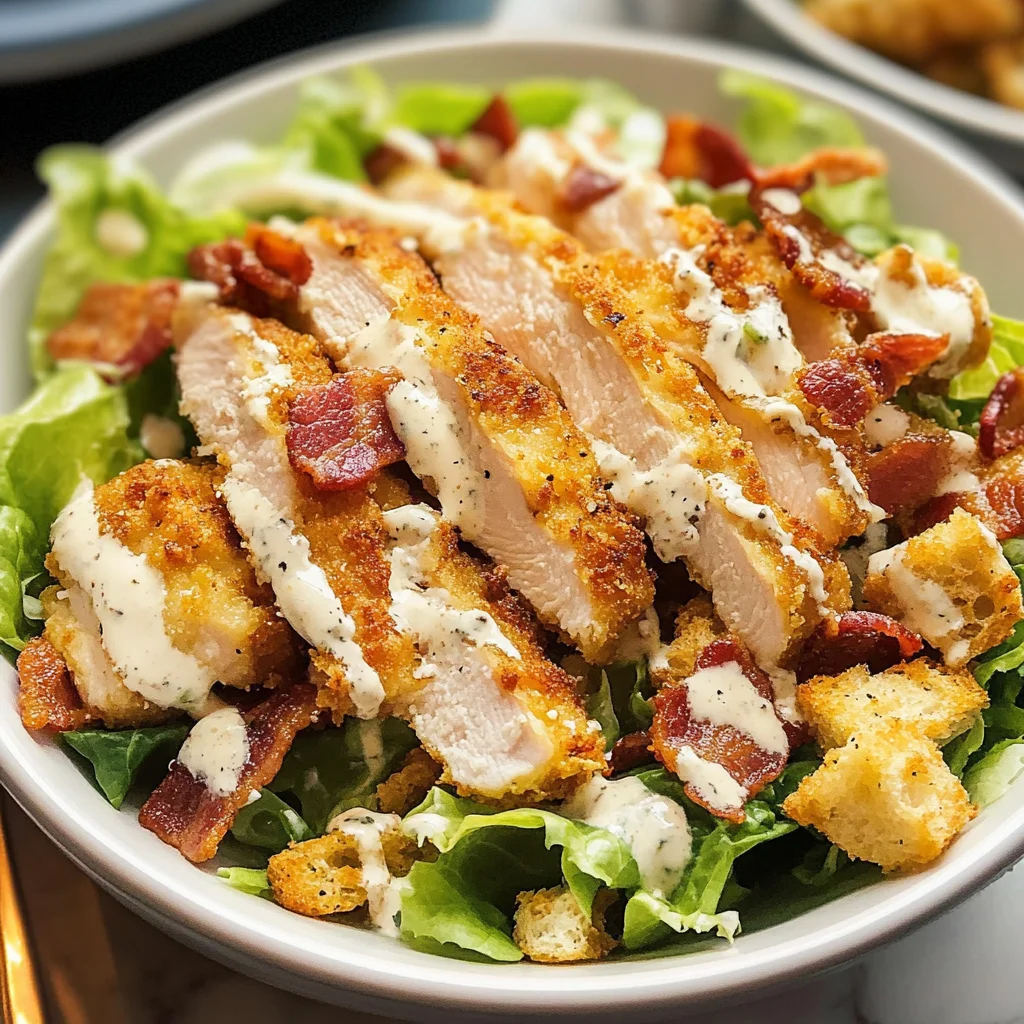
EXTRA Crispy Chicken Caesar Salad
If you’re looking for a delicious way to brighten up your weeknight dinners, this EXTRA Crispy Chicken Caesar Salad is just the ticket! It’s one of those recipes that feels like a treat yet is easy enough for any busy evening. The combination of crispy chicken, crunchy parmesan croutons, and a tangy homemade dressing makes this dish not only satisfying but also a real crowd-pleaser. Whether you’re hosting family or just craving something special, this salad fits the bill perfectly!
I love how this recipe brings together simple ingredients to create something truly delightful. It’s versatile enough for casual gatherings or even meal prep for the week ahead. Trust me; once you try it, you’ll want to make it again and again!
Why You’ll Love This Recipe
- Easy Preparation: This salad comes together in about 50 minutes, making it perfect for those nights when you want an impressive meal without spending hours in the kitchen.
- Family Favorite: With its crispy chicken and creamy dressing, it’s sure to be a hit with both kids and adults alike.
- Make-Ahead Friendly: You can prepare the croutons and dressing in advance, so all you need to do is fry the chicken and toss everything together when you’re ready to eat.
- Flavor Packed: The combination of fresh ingredients and savory flavors means every bite is bursting with taste.
- Customizable: Feel free to tweak the ingredients based on what you have on hand or your personal preferences.

Ingredients You’ll Need
Gathering your ingredients should be fun! This EXTRA Crispy Chicken Caesar Salad uses simple, wholesome items that are easy to find. Here’s what you’ll need:
For the Dressing
- 1 cup / 240g full fat Mayo
- 1/3 cup / 30g freshly grated Parmesan
- 2 Anchovy Fillets
- 2 tbsp Milk (preferably whole milk)
- 1 Lemon (juice only)
- 1 tsp EACH: Dijon Mustard, Worcestershire Sauce
- 1 small clove of Garlic
- 1/4 tsp EACH: Salt, Black Pepper (or to taste)
For the Chicken
- 2x 7-9oz/200-250g Chicken Breasts
- 1 cup / 65g Panko Breadcrumbs
- 1/4 cup / 40g Flour
- 2 Eggs (beaten)
- 1 tsp EACH: Salt, Garlic Powder
- 1/2 tsp Black Pepper
For Frying
- 1 cup / 240ml Vegetable Oil (for frying)
For the Salad
- 2 large heads of Romaine Lettuce (chopped, approx 8oz/220g EACH)
- 6 slices of Bacon (cooked, cooled & diced)
- 4oz / 120g Ciabatta (preferably day old)
- 1/2 cup / 40g freshly grated Parmesan
- 1 tbsp Olive Oil
- Salt, Garlic Powder & Black Pepper (for croutons)
Variations
This EXTRA Crispy Chicken Caesar Salad is wonderfully flexible! Here are some tasty variations you might enjoy:
- Swap the protein: Try using grilled shrimp or tofu instead of chicken for a different twist.
- Go vegetarian: Omit the bacon and add roasted chickpeas for added crunch and protein.
- Change up the greens: Mix in spinach or kale with your romaine for an extra boost of nutrients.
- Add more veggies: Toss in cherry tomatoes or avocados for added freshness.
How to Make EXTRA Crispy Chicken Caesar Salad
Step 1: Prepare the Dressing
In a food processor, blitz together all your dressing ingredients until smooth. This step is crucial because it blends all those wonderful flavors into a creamy sauce that will coat your salad beautifully.
Step 2: Prep Croutons
Dice your ciabatta bread into small bite-sized pieces. Toss them with olive oil, garlic powder, black pepper, and salt. This ensures every piece gets flavorful before baking!
Step 3: Bake Croutons
Spread parchment paper on a tray and sprinkle grated parmesan over it. Then add your seasoned croutons on top and bake at 180C/350F for about 10 minutes until they are golden brown. Letting them cool helps them crisp up even more!
Step 4: Prep Chicken
Combine salt, garlic powder, and black pepper in a small pot. Slice each chicken breast horizontally to create thinner pieces that cook evenly. This step helps ensure that every bite is juicy!
Step 5: Dredge Chicken
Set up three shallow dishes: one with flour mixed with half your seasoning, one with beaten eggs, and another with breadcrumbs mixed with the rest of the seasoning. Dredge each piece of chicken through these stations thoroughly—this creates that perfect crispy coating!
Step 6: Fry Chicken
Heat vegetable oil in a heavy pan over medium heat until hot enough for frying (about 180C/350F). Fry two pieces at a time for about 3-4 minutes per side until golden brown and cooked through. Placing them on a wire rack afterward keeps them crispy.
Step 7: Assemble Your Salad
In a large mixing bowl, toss chopped romaine lettuce with your desired amount of dressing—start light and add more if needed! Add in the cooked bacon and croutons before serving individual portions topped with sliced chicken. Drizzle more dressing over if desired.
Now you’re ready to dig into this deliciously EXTRA Crispy Chicken Caesar Salad! Enjoy every bite!
Pro Tips for Making EXTRA Crispy Chicken Caesar Salad
Creating the perfect crispy chicken Caesar salad is all about attention to detail and a few helpful tricks! Here are some tips to ensure your dish turns out deliciously every time.
-
Use Panko Breadcrumbs: Opting for panko instead of regular breadcrumbs gives you that extra crunch. The larger flakes create air pockets that crisp up beautifully when fried.
-
Double-Dredge the Chicken: For an even crispier coating, consider double-dredging the chicken. After the first round of flour, egg, and breadcrumbs, repeat the process before frying; this adds an additional layer of crunch.
-
Monitor Oil Temperature: Ensuring your oil is at the right temperature (around 180C/350F) is crucial. Too hot, and the outside will burn before cooking through; too cool, and it will absorb oil and become greasy. A breadcrumb should sizzle upon contact to confirm readiness.
-
Cool on a Wire Rack: Once fried, place your chicken on a wire rack rather than paper towels. This allows air circulation around the chicken, keeping it crispy rather than steamy.
-
Fresh Ingredients Matter: Using fresh romaine lettuce and high-quality parmesan cheese enhances both flavor and texture. The freshness will shine through in every bite of your salad!
How to Serve EXTRA Crispy Chicken Caesar Salad
Presentation can elevate even the simplest dishes! Here are some ideas on how to serve your EXTRA Crispy Chicken Caesar Salad for maximum enjoyment.
Garnishes
- Lemon Wedges: A squeeze of fresh lemon juice right before serving brightens up the flavors and adds a zesty kick.
- Extra Parmesan Shavings: A few shavings of freshly grated parmesan cheese on top not only look beautiful but also add richness to each bite.
- Chopped Fresh Herbs: Sprinkling some chopped parsley or chives can offer a pop of color and freshness that complements the salad beautifully.
Side Dishes
-
Garlic Bread: This classic side pairs perfectly with Caesar salad. The buttery garlic flavor complements the salad’s richness while providing a satisfying crunch.
-
Roasted Vegetables: Seasonal roasted vegetables add a lovely contrast in texture and flavor. Think zucchini, bell peppers, or seasonal root veggies tossed with olive oil and herbs.
-
Quinoa Salad: A refreshing quinoa salad with cucumber, tomatoes, and a light vinaigrette can serve as a nutrient-rich side dish that balances the meal nicely.
-
Fruit Salad: For something sweet to finish off your dinner, a light fruit salad offers a refreshing endnote. Opt for seasonal fruits for vibrant flavor and color!
Now you have everything you need to whip up this delightful EXTRA Crispy Chicken Caesar Salad! Enjoy every crunchy, creamy bite!
Make Ahead and Storage
This EXTRA Crispy Chicken Caesar Salad is perfect for meal prep! You can prepare components ahead of time, making it a breeze to assemble when you’re ready to enjoy.
Storing Leftovers
- Store leftover salad components separately to keep everything fresh.
- Place the crispy chicken in an airtight container in the fridge for up to 3 days.
- Keep croutons in a sealed bag at room temperature for maximum crunch.
- Store any extra dressing in a jar with a tight lid in the fridge for up to a week.
Freezing
- While it’s best to enjoy this salad fresh, you can freeze cooked chicken.
- Wrap individual chicken portions tightly in plastic wrap and place them in a freezer-safe bag.
- The chicken can be frozen for up to 2 months.
Reheating
- To reheat frozen chicken, thaw it overnight in the refrigerator.
- Warm chicken pieces in the oven at 350°F (175°C) for about 10-15 minutes until heated through.
- Avoid microwaving as it can make the chicken soggy.
FAQs
If you have questions about making this delicious salad, you’re not alone!
How do I make EXTRA Crispy Chicken Caesar Salad without anchovies?
You can simply omit the anchovies from the dressing recipe. For added flavor, consider using a bit more Worcestershire sauce or adding a teaspoon of capers.
What makes this Chicken Caesar Salad extra crispy?
The chicken is double-battered with seasoned flour and panko breadcrumbs before frying, giving it that delightful crunch. Plus, the homemade croutons add even more texture!
Can I use store-bought dressing for my Chicken Caesar Salad?
Absolutely! If you’re short on time, feel free to use your favorite store-bought Caesar dressing. Just remember that homemade dressing usually tastes fresher and more vibrant!
How long does it take to prepare an EXTRA Crispy Chicken Caesar Salad?
It takes approximately 30 minutes of prep time and around 20 minutes of cooking time, making it a quick and satisfying meal option.
Final Thoughts
I hope you’re as excited about this EXTRA Crispy Chicken Caesar Salad as I am! It’s not only packed with flavor but also has that irresistible crunch that keeps you coming back for more. Enjoy making this dish for yourself or sharing it with friends and family—there’s nothing like a hearty salad to brighten up your day. Happy cooking!
EXTRA Crispy Chicken Caesar Salad

Looking to elevate your weeknight dinner? This EXTRA Crispy Chicken Caesar Salad is an irresistible blend of crunchy textures and bold flavors that will delight your taste buds. Featuring perfectly fried chicken, homemade croutons, and a zesty dressing, this salad is both satisfying and simple to prepare. Whether you’re enjoying it on a busy night or serving it up for family gatherings, this dish brings the comfort of a classic Caesar salad without the fuss. Plus, it’s easily customizable to suit your preferences! Dive into a bowl of this deliciousness and enjoy every crunchy bite.
- Prep Time: 30 minutes
- Cook Time: 20 minutes
- Total Time: 50 minutes
- Yield: Serves 4
- Category: Main
- Method: Frying
- Cuisine: American
Ingredients
- 2x 7-9oz/200-250g Chicken Breasts
- 1 cup / 240g full fat Mayo
- 1/3 cup / 30g freshly grated Parmesan
- 1 Lemon (juice only)
- 1 small clove of Garlic
- 1 tsp EACH: Dijon Mustard, Worcestershire Sauce
- 1 cup / 65g Panko Breadcrumbs
- 1/4 cup / 40g Flour
- 2 Eggs (beaten)
- 1 tsp EACH: Salt, Garlic Powder
- 1/2 tsp Black Pepper
- 1 cup / 240ml Vegetable Oil (for frying)
- 2 large heads of Romaine Lettuce (chopped, approx 8oz/220g EACH)
- 4oz / 120g Ciabatta (preferably day old)
- 1 tbsp Olive Oil
- Salt, Garlic Powder & Black Pepper (for croutons)
Instructions
- Prepare the dressing by blending mayonnaise, Parmesan cheese, lemon juice, garlic, and seasonings in a food processor until smooth.
- Dice ciabatta into cubes, season with olive oil and spices, then bake until golden brown.
- Season chicken breasts and double-dredge them in flour, eggs, and panko breadcrumbs.
- Fry the chicken until crispy and golden brown.
- Toss romaine lettuce with dressing, add croutons and sliced chicken before serving.
Nutrition
- Serving Size: 1 salad (approximately 350g)
- Calories: 550
- Sugar: 2g
- Sodium: 800mg
- Fat: 34g
- Saturated Fat: 6g
- Unsaturated Fat: 20g
- Trans Fat: 0g
- Carbohydrates: 30g
- Fiber: 3g
- Protein: 35g
- Cholesterol: 120mg